3D Carbon Door Trim Overlay / Garnish / Protector - 2020+ Supra
€75,95 EUR
%3Cp%3EEarn%20[points_amount]%20when%20you%20buy%20this%20item.%3C/p%3E
Sticker Fab has distributed over 20,000 vinyl products in the last few years! This new platform will be a great canvas for their accents and protection items.
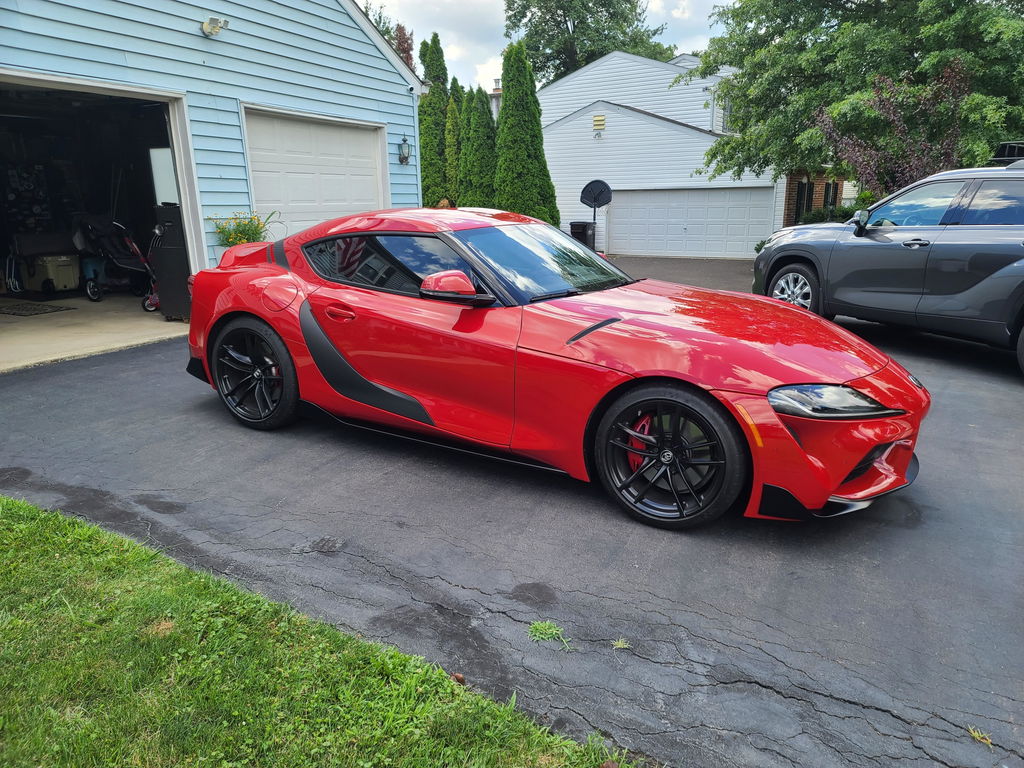
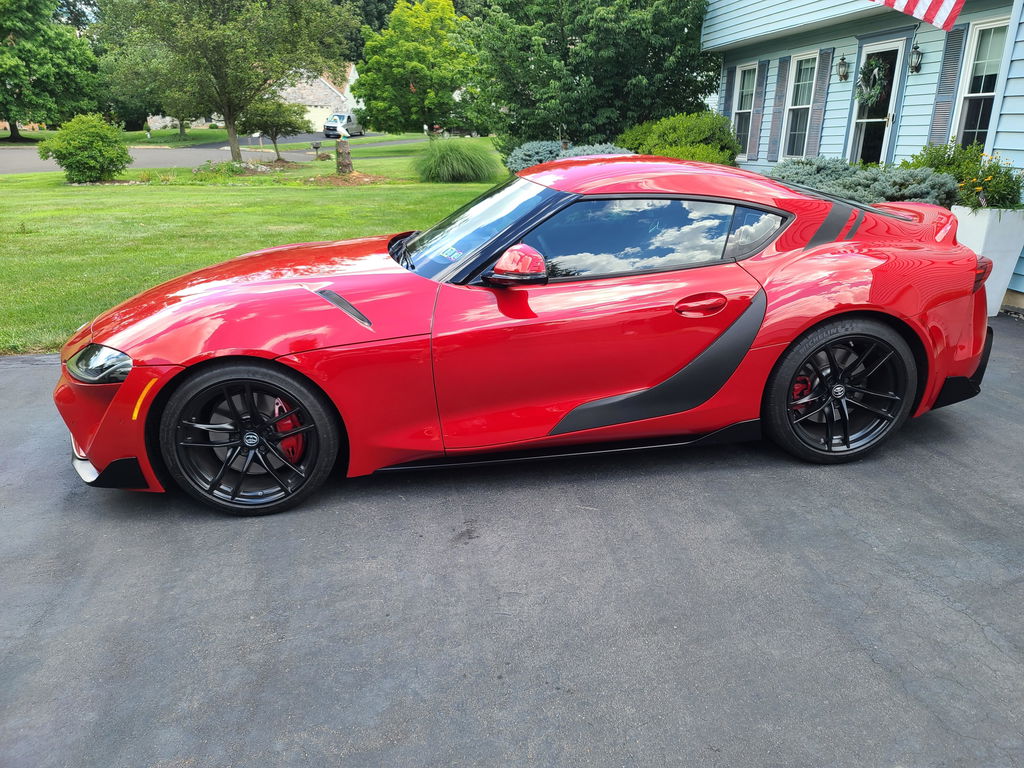
Sold as a pair (left/right). Installing vinyl is a task usually left to the pros. However countless hours were invested in making a product that could be user installed. A couple pieces overlay with precision and the overall effect is a textured carbon look panel. This a great way to get an aftermarket look without paying around 1000 dollars.
NOTE: We have installed this on a white vehicle and it looks great. Material was left so that you could wrap it around the edges a bit. This makes it look more like a carbon panel vs overlay.
Dragon Wrap™ Carbon Fiber Film is a 5.6 mil calendered vinyl film featuring a clear repositionable permanent acrylic adhesive on an air-egress liner. This film has excellent dimensional stability, outstanding durability and outdoor performance. This repositionable permanent adhesive offers minimal initial bond growing to permanent bonds that facilitates application of large graphics. The air egress liner also aids in large graphic application.
Lasts up to 5 years outdoors.
Care Details: Concept Carbon Fiber film should be maintained to preserve long term appearance using standard aftercare products designed for textured exterior vinyl surfaces. A commercially available protectant such as Armor All or 303 Aerospace Protectant is recommended. DO NOT use waxes of any type.
Items you may want to have:
Clean the application area and make sure it is clear of any dirt, debris, and ideally wax. Having a hair dryer or heat gun is required. Do not use excessive heat. Bare minimum required is the best rule.
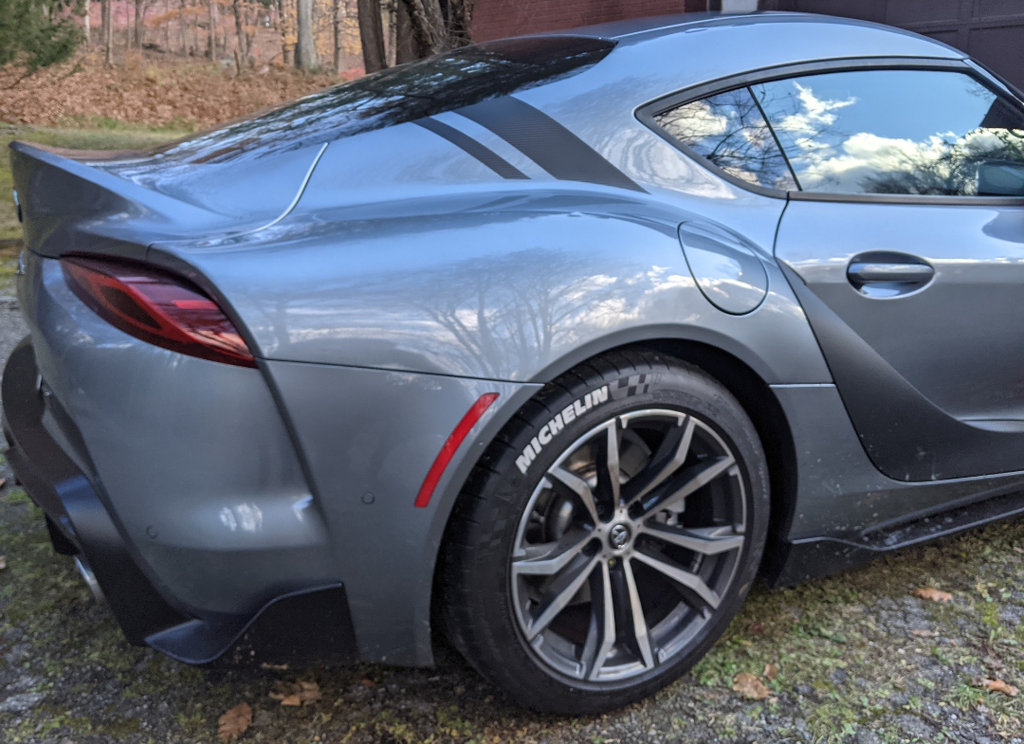
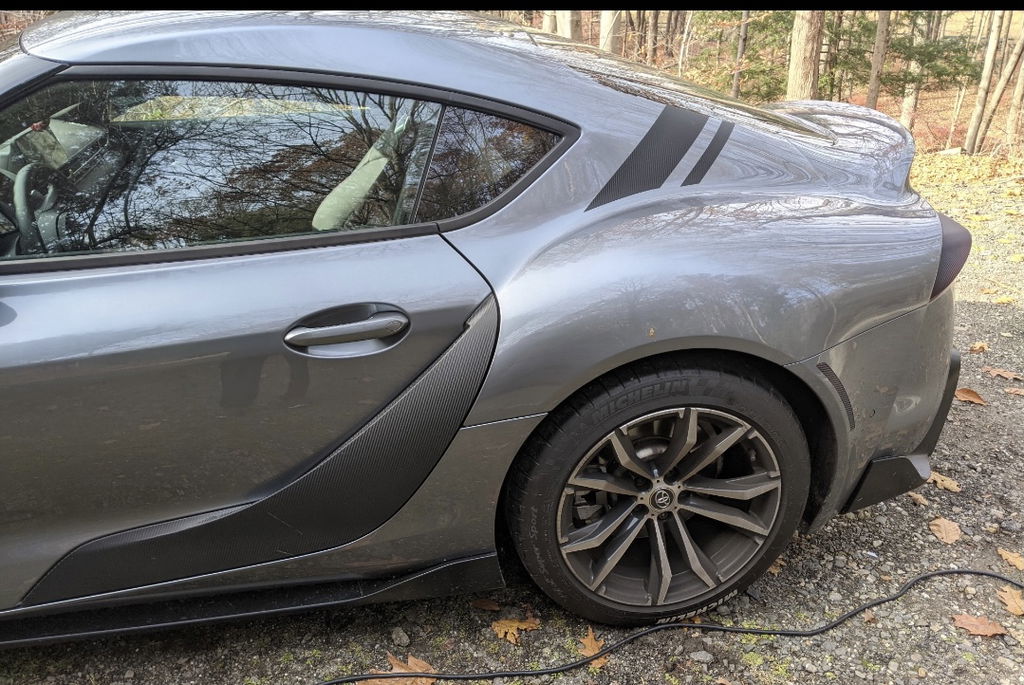
You want to align the end by the door handle first (aka the back of the door) Please pay close attention to our installation photos. Once you have laid this area down, start working your way to the other side. Make sure it lays down naturally across the bottom of the door. If the alignment is off at the end, then the alignment was off at the start. Reposition and try again. Push areas down with your fingers until nothing else will stick.
Then carefully apply small amounts of heat and wrap the edges around side and bottom of the door. It is easier to open the door to do these areas. Once you have completed the bottom, work both ends evenly towards the little cut out in the center of the top. For the area towards the front of the door, you can use a stiff piece of plastic or cardboard to wrap the vinyl around the trim.
Pay special attention to the area in front of the fake door trim. Using heat you want to push this area down, but hold on to the little piece that tucks down in front of the fake vent. You want to carefully guide this portion to cover the paint. Now that everything is down, apply the additional small piece to cover up the other areas.
Some very small correction strips care included in case you tear a small part of the vinyl in front of the fake vent. Match the pattern up, cut to an appropriate size and apply. You will be surprised how well these strips work!
3D Carbon Door Trim Overlay / Garnish / Protector - 2020+ Supra
I installed these without any prior experience and they came out great. I used the stickerfab felt squeegee and it helped push the vinyl around and remove any bubbles. I suggest that you don't follow all of the instructions on the product page though. Specifically the order to install everything. If you install the small separate piece near the inside of the fake door intake first, then you can hide all of the edges with the larger vinyl piece and the install will beuch more simple.
I had lots of trouble with the front of the door, where it comes to a point. In the end I just used a razor to slit it a couple times and then pushed each piece around the edge. It isn't perfect and I hope it holds over time.
But haven’t gotten any love for being such a repeat customer… Just Kidding. Keep up the good work! Down to wrap The Whole car in stickerfab carbon fiber just throwing that out there…