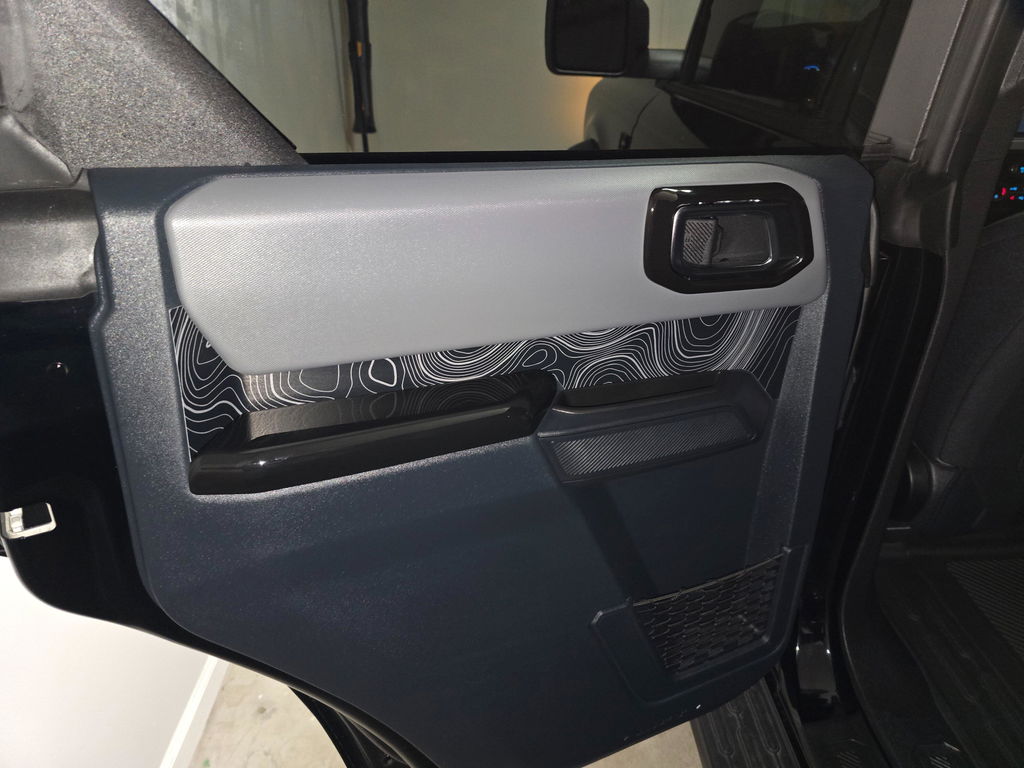
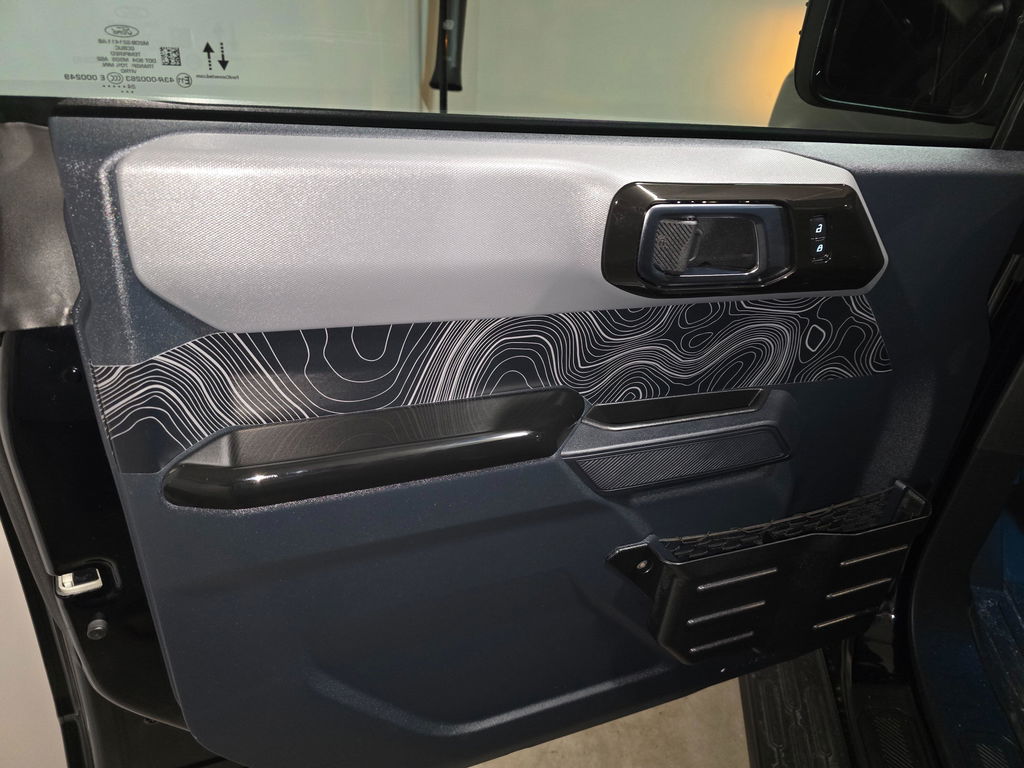
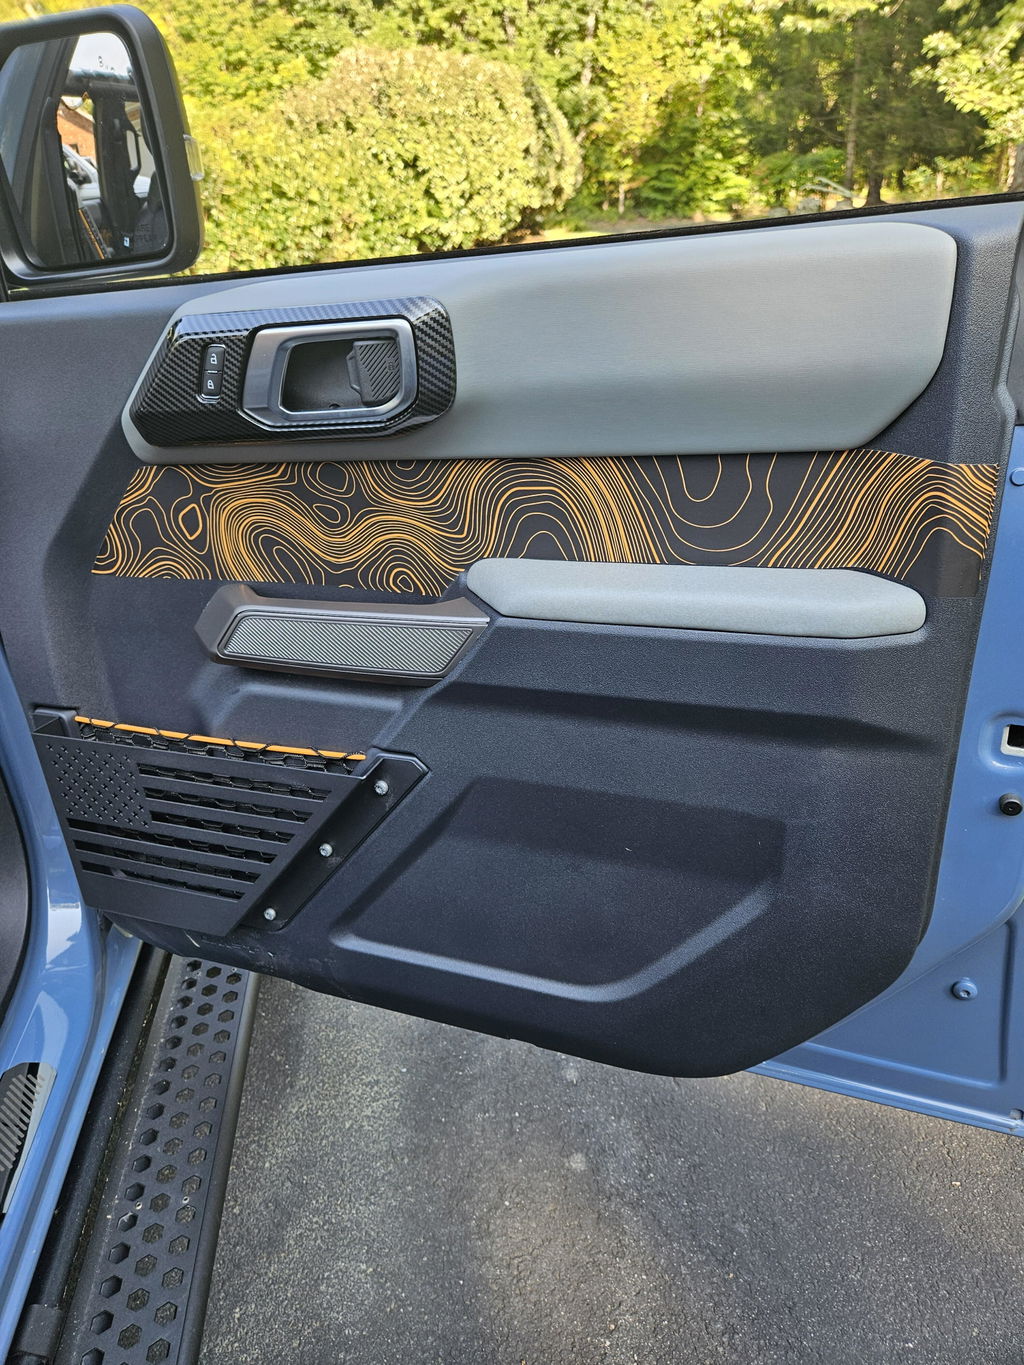
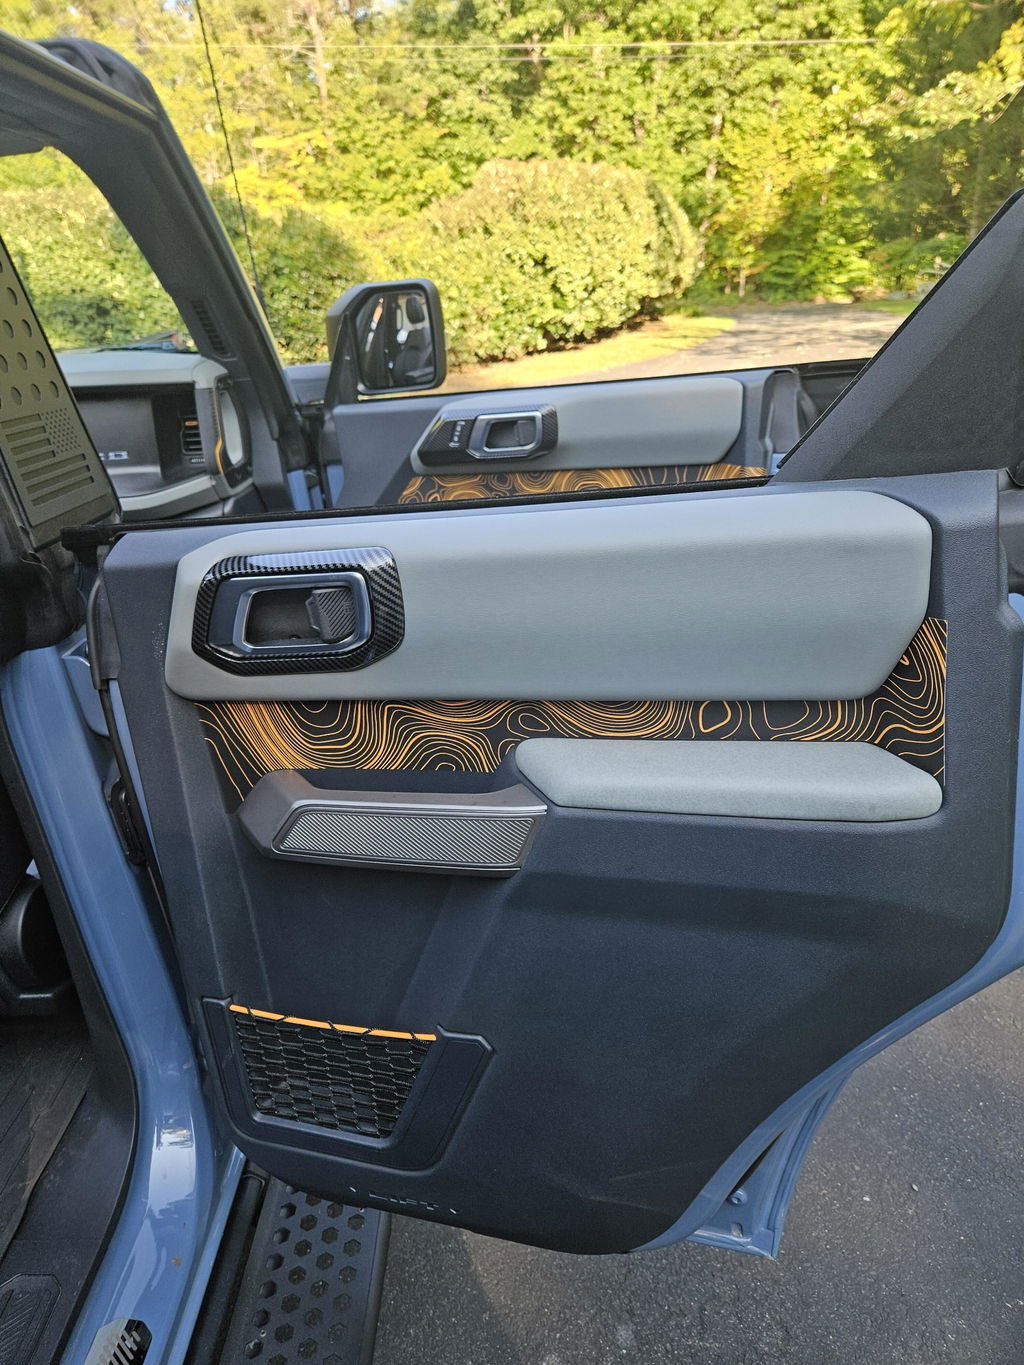
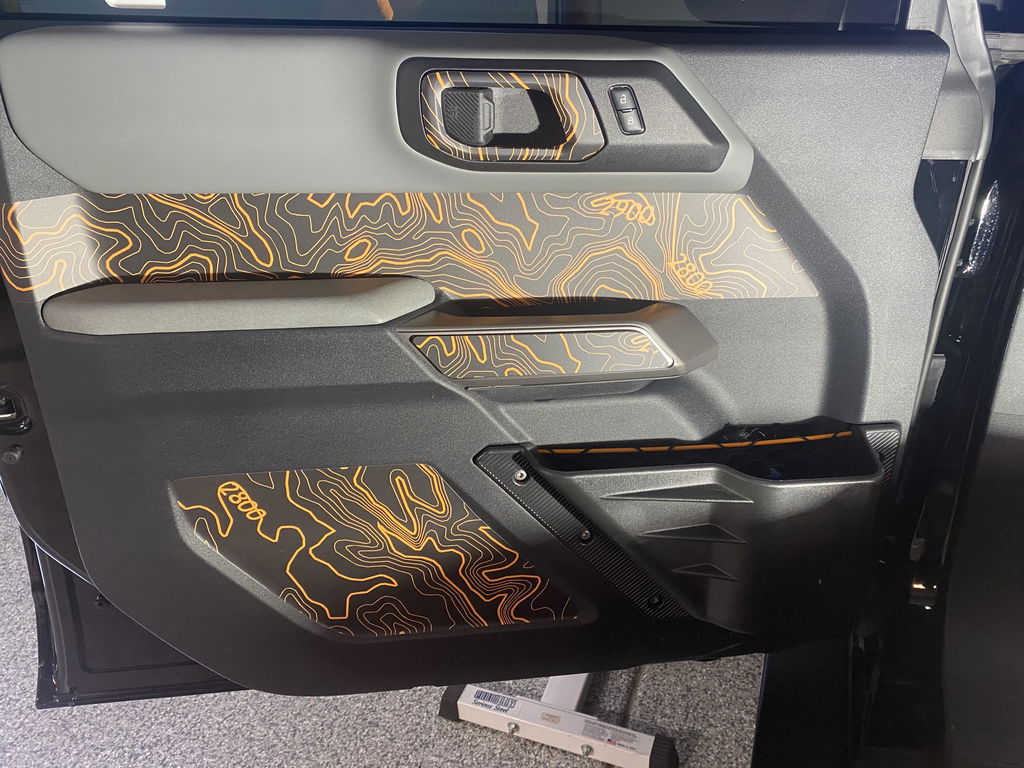
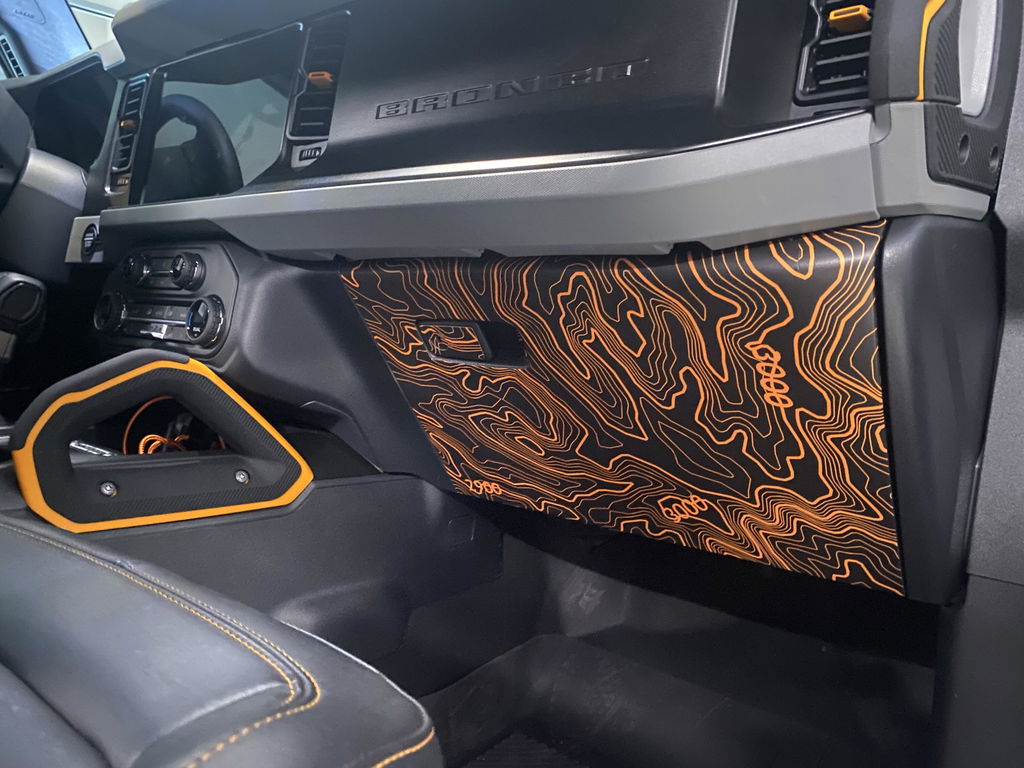
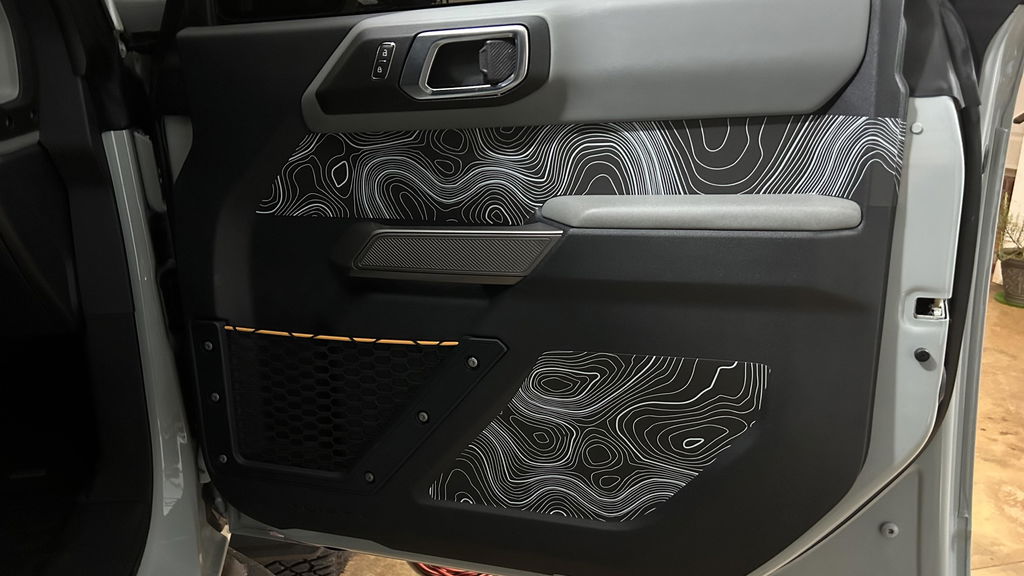
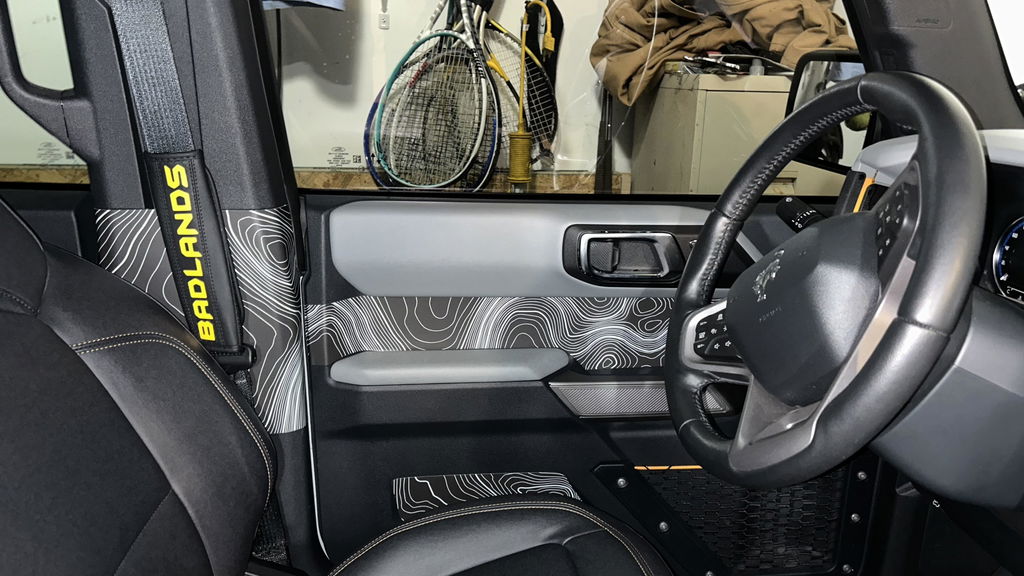
Cover the plain, easy-to-damage plastic door cards with a precision-cut topo overlay — protective, matte, and a perfect match for the rest of a topo-themed interior.
⚠ Fitment: This set fits all 4-Door 2021+ Broncos, front doors only. Need a different set? • 2-Door version • Rear 4-Door set
Protect & Theme the Door Cards
This topo theme is popular in the off-road community if you can get your hands on the right designs and templates. Here we're covering the plain, easy-to-damage plastic door cards with topographical map vinyl overlays.
The material is specially designed to grip textured plastic. It's a high-tack overlay that protects the soft trim from light abrasion and can cover up minor imperfections and discolorations. Currently fits ALL 4-Door 2021+ Broncos. Matte finish.
Designs
Topo
Generic Topo — a nice topographical map style, now also offered in the new Ford OE colors Marsh Gray, Avalanche Gray & Ruby Red
Badlands — an actual location in Badlands National Park, based on USGS maps
Bronco Knoll — the coordinates marked on every Bronco: 34.5261° N, 116.75685° W
Non-Topo
3D Carbon Fiber — solid 3D carbon-fiber-textured material, the same premium finish used across many of our other products
High-Tack Interior Vinyl — Installation
For the best adhesion and long-term results, install in a clean, dry environment at roughly 75°F (24°C) or warmer. Let both the vehicle interior and the vinyl reach room temperature before you start.
Surface Preparation
Proper prep is extremely important, especially on textured interior plastics.
Clean the area thoroughly. Remove all dust, dirt, oils, detailing products, protectants, waxes, and silicone dressings. Products like Armor All and other interior protectants leave residue that stops the adhesive from bonding.
Make sure the surface is completely dry and residue-free before applying the vinyl.
Wash and dry your hands before handling the vinyl. Oils, lotion, and dirt from your hands transfer to the adhesive and reduce adhesion.
Keep the vinyl, your hands, and the install area clean throughout the entire installation.
Installation
Position carefully before applying full pressure. Start in one area and gradually work across the piece, pressing firmly with your fingers or a soft tool. Avoid trapping air or stretching the material.
Once it's aligned, go back over the whole piece with firm, consistent pressure — paying special attention to edges, corners, curves, recessed areas, and any transition over textured plastic.
High-tack adhesive develops its strongest bond with pressure and time, so pressing the material firmly into the surface is a key part of the install.
Optional Heat
A heat gun or hair dryer helps but isn't required for every install. A little heat helps the vinyl conform to curves, textured areas, and edges, and helps activate the adhesive.
Use gentle, controlled heat — keep it moving, never concentrate it in one spot. The vinyl should get slightly warm and flexible, never extremely hot. After warming an area, press it firmly while it cools.
The First 72 Hours
The adhesive keeps developing its bond after installation. For about 72 hours, periodically inspect the vinyl — particularly the edges and corners. If an edge begins to lift:
Make sure the area is clean.
Gently warm the vinyl if needed.
Press it firmly back into position and hold pressure briefly while it cools.
Re-pressing the edges a few times over this window makes a real difference. Avoid interior cleaners, protectants, or excess handling of the area during this bonding period, and avoid extreme temperature swings right after install.
If an Edge Moves or Shrinks
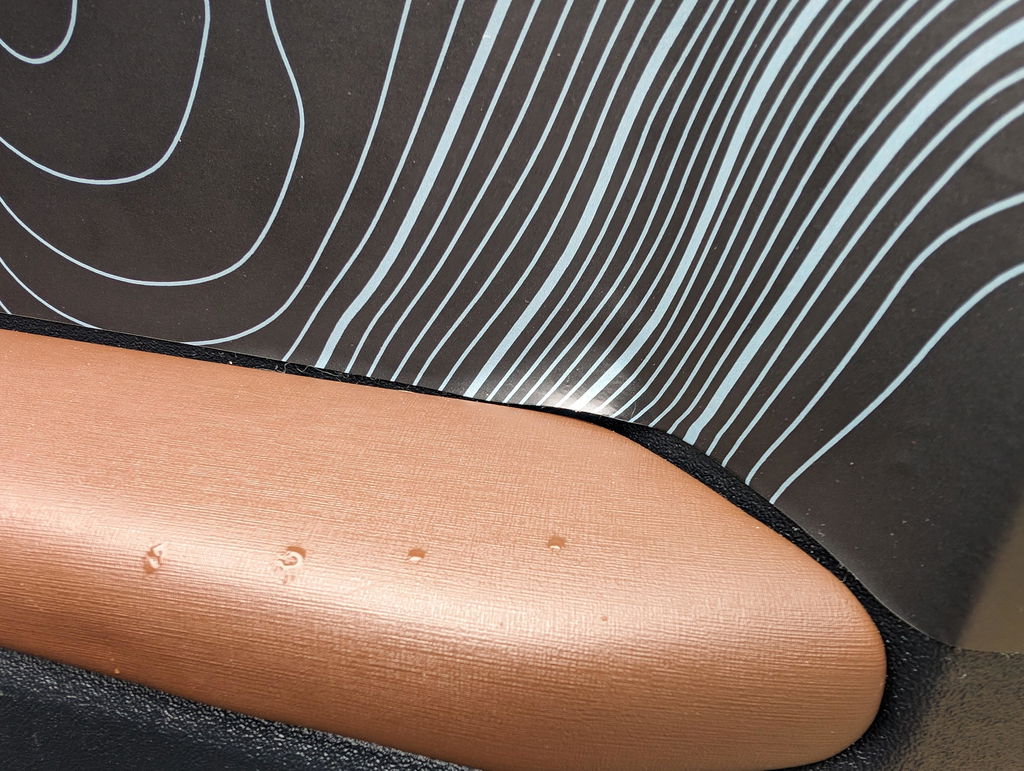
Some vinyl can settle slightly over curved or textured surfaces or with temperature changes. If an edge has pulled back, it can usually be corrected. Do not just stretch the exposed edge back while it's still stuck to the surrounding surface. Instead:
Clean your hands and the surrounding area thoroughly — dirt or oils under the vinyl can permanently affect adhesion.
Carefully lift enough of the vinyl to release the tension in the material.
Apply a small amount of gentle heat to soften and relax it.
Reposition without over-stretching, then press firmly into place — concentrating on the edge and surrounding area — and hold as it cools.
Keeping the adhesive side, the surface, and your hands clean during any adjustment is extremely important. For a stubborn spot that won't stay down, a 3M primer pen along that edge solves it.
For best results: install around 75°F or warmer, start with a completely clean surface, wash your hands before handling the vinyl, use firm pressure, and monitor the edges during the first 72 hours. A little extra attention during the initial curing period makes a big difference in long-term adhesion, especially on the Bronco's textured interior plastics.
Recommended items: this kit • microfiber cloth • interior cleaner (no wax / no protectant) • alcohol wipe • mini heat gun or hair dryer • optional 3M primer pen for trouble spots.
So this is my second try with these. The first time I just couldn't get them to stick. Kept having to pull them up and ended up stretching the vinyl too much. This time I used another adhesive promoter (primer adhesive promoter wipes) and they made a huge difference. I didn't have luck using the 3M sticks on the overlays the first time or getting some other trim pieces (bought elsewhere) to stick. Once on correctly, they look great. Definitely add flare and cover up any blemishes you may have in that area. After getting them on I thought I would be able to still slide in the plastic door handle storage boxes (shown in pics). Unfortunately, I was wrong. The back of the box sits on top of part of the vinyl on all four doors and it started to damage the vinyl making it bubble. Learned my lesson. Now I'm going to have to attempt this for a third time and not use the storage boxes.
B
Bradley (Rileyville, VA, US)
Looks good
Went with The badlands color and did both the front and back.
M
Michael Jensen (Rio Rancho, NM, US)
Badlands tapo
Good fitment. Good quality. Got the badlands orange. Liked how it changed up the interior. Gave a 4 star, not on product itself, shipping on the slow side.
J
Jose Garcia (Marietta, GA, US)
nice look!!
Instalation was easy following the you tube videos...
I get the code orange and really change the interior look..
I am very please with the product..
Thanks Guys
B
Bryant Beers (Charlotte, NC, US)
Looks great, but hard to get it to stick
The decals look great on my Area51 OBX, but due to the texturing of the plastic side panels on the door; it makes it very hard to get the decal to stick. We cleaned the surface with alcohol, wiped down with microfiber cloth, and used a heat gun during application, and it still will not stick in certain spots. I'm not sure if we got a defective decal, or the glue just isn't the best. We've held off from doing the other door until we can get this resolved.
Hello, the 75-85 degree weather is key to this install. I don't believe it could be achieved at your location in the winter.
Please continue to hold off until it is warmer. You can attempt to use a 3M promoter pen for what you already attempted to install though.
M
Michael Nocton (Maryville, TN, US)
Great print, fit, and feel
This is the product I’ve been waiting for. They really dress up the front doors from the basic bland gray plastic panels. I can’t wait for Stickerfab to release similar vinyl for the back doors. Their customer service is also top notch.
A
Amanda Brunken (Grand Island, NE, US)
Nice product
A couple improvements would make this amazing. I think it should cover a bit more to make it look a little less like a decal. I would like to see it drop in the front more as well as in the door handle opening. I did trim off the tail of the decal to stop before it comes up and wraps around the door edge. I thought it matched up a little more with the lower decal. I do really like the material it was super easy to apply and has a nice feel to it. It's great to hide scratches or prevent them you pick. That is one of the reasons I think it should drop inside the door handle opening to help with scratching in that area which is prone to rings and such.
{"id":47112887763263,"title":"Default Title","option1":"Default Title","option2":null,"option3":null,"sku":"HG300","requires_shipping":true,"taxable":true,"featured_image":null,"available":true,"name":"Mini Heat Gun for Vinyl Application (300W)","public_title":null,"options":["Default Title"],"price":1599,"weight":255,"compare_at_price":null,"inventory_management":"shopify","barcode":null,"requires_selling_plan":false,"selling_plan_allocations":[],"quantity_rule":{"min":1,"max":null,"increment":1}}
{"id":44766628053311,"title":"Default Title","option1":"Default Title","option2":null,"option3":null,"sku":"94.66MLAMPULE","requires_shipping":true,"taxable":false,"featured_image":null,"available":true,"name":"3M 94 Primer Pen for Vinyl Application - Ground Shipping Only","public_title":null,"options":["Default Title"],"price":299,"weight":57,"compare_at_price":200,"inventory_management":"shopify","barcode":"7000050137","requires_selling_plan":false,"selling_plan_allocations":[],"quantity_rule":{"min":1,"max":null,"increment":1}}